Get Sharpness With Other Camera Supports

OLYMPUS DIGITAL CAMERA
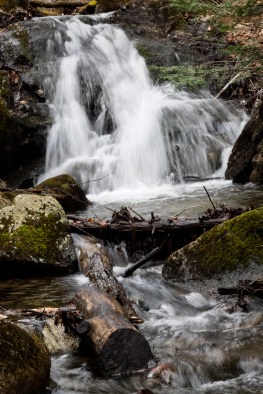
Spring Runoff by Carol Brown

Tripods are not the only option for getting added sharpness when shooting at slower shutter speeds.  Travelling with a tripod can be difficult if you must pack really light.  In addition, tripods can be hard to take to some places, such as when you are photographing along a historic street with some tourists who might trip over them.  Some places even prohibit them.   Tripods can also be awkward to carry and move around in some settings, such as at sports events.  Luckily, you have alternatives.

Beanbags Make very Portable Supports:
Beanbags are very pliable bags against a solid surface.  Some actually have beans inside, although most have plastic pellets.  The bag molds against the camera to help you hold it stable against a post, chair, bookcase, parking meter, or any other convenient, non moving object.
Monopods are  Great for Sports Action:
A monopod is like one leg of a tripod with a head on top.  These are great for shooting sports because the monopod can carry the weight of the camera and lens as you watch the action develop.  They can be used in a lot of situations where you need a slower shutter speed but cannot use a tripod, and you can quickly move out of the way if needed.
Gorillapods Wrap around Objects:
The Gorillapod looks like a miniature tripod with bendable legs.  It comes in different sizes for different sizes of cameras.  Although it can support a smaller camera directly, most of the time a Gorillapod is used by wrapping its legs around a solid object, such as a post.  The unit itself is very lightweight.
Table tripods can help with Small Cameras:
Miniature, folding tripods can fit into a camera bag, and can be opened and used on a table or any other flat solid surface to keep your camera stable during exposure.  The smallest ones can be kept with a pocket digital camera to let you shoot with slow shutter speeds anywhere.
Marg Jackman

Depth-of-Field Tutorials for the April Meeting

This video may be a good primer for Depth of Field and may be a good one to show during the club meeting. It is 6:13 minutes in length.

Part 1- Short Lens by Mike Browne

https://www.youtube.com/watch?v=8uU9O8c7Hss

And here is the other part of Mike’s demonstration where he pulls it all together

Part 2- Long Lens by Mike Browne

https://www.youtube.com/watch?v=98-WvzWvt7M

This one is pretty basic and is fairly easy to understand

By Cam Crunch

https://www.youtube.com/watch?v=iHxG1f3X1f4

This one is a bit more technical and is explained with drawings. While a little harder to get your head around, it may help to shed light on the concepts in a different way.

By Dylan Bennett

https://www.youtube.com/watch?v=34jkJoN8qOI

Some good tips on shooting photographs that require a very wide depth of field.

By lynda.com

https://www.youtube.com/watch?v=XlQaiCPTFS4

(Hint: Also, search YouTube for “Hyperfocal Distance”)

Some good demonstrations on shooting portraits with a shallow DOF

By Adorama TV

https://www.youtube.com/watch?v=OUYuUs1aaCU

There are many Depth of Field Calculators available online and in Apple and Android environments. You can simply dial in your Camera Sensor Size, Aperture Value, Focal Length and Distance to Subject. The DOF calculator will give your DOF for those values.

Phil Tughan

Marg’s Tip for April

Figure Out What Type of Photographer You Are

april-hints-figure-out-what-kind-of-photographer-you-are

You should try shooting all sorts of stuff – from food to landscapes, from portraits to sports, from products to travel, and everything in between.  When you are just starting out, shoot everything. And once you have done that, sit down and figure out what kind of photographer you really want to be and work on that.

The first step is to take a good look at the stuff you’ve been shooting and ask yourself, “Which one of these do I seen to have knack for? Or, Which shots have people told me I have a knack for?  Chances are there is something you shot that you particularly felt you had a knack for – you just kind of knew what to do.

Okay, that’s step one (and it might be more than one thing – you might feel like you have a knack for travel, sports and natural light portraits, and that’s okay).  The next step is to ask yourself, “Which one of these do I really enjoy shooting?”  This is really important, because this is what you should be focusing on.  There’s no sense at getting really good at product photography when what you really want to be is a natural light portrait photographer.

But, few photographers, even more experienced ones, really sit down and think this through – they just shoot what comes their way.  And while they may wind up being competent at shooting a lot of different things, I’m guessing being competent isn’t your goal (it’s like getting a C+ in class).  Finding who you are as a photographer allows you to focus your learning, your energy, and your time in the right direction.  When you start to get good at what you really enjoy, this is when the magic happens.

Marg Jackman


Orchidophelia

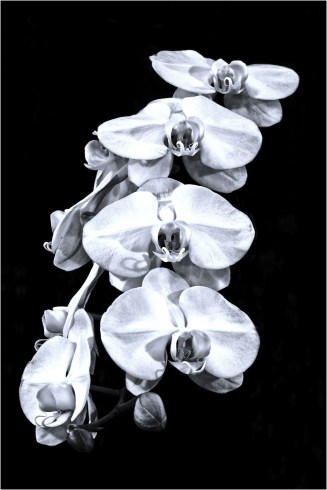
orchids by Ron Pierce
Orchids by Ron Pierce

For a chance to shoot some spectacular flowers, visit the orchid show which is back at the RA Centre on the weekend of Saturday April 22 from 12:00 to 5:00 and Sunday April 23 from 9:00 to 5:00.

For more details check out their website. They encourage photography but limit the use of tripods to Sunday the 23rd from 9:00 to 11:00

To see a few examples of images shot by club members at a past show look at our May 2014 gallery.

World Backup Day!

wbd_horizontalDid you know that Friday March 31st is World Backup Day?

If your computer or smartphone failed tomorrow or it was infected with ransomware, all the files it contains could be lost! Would you lose all your precious photographs?

Do you have a backup plan in place?

If you need help with setting up a backup procedure why not book an hour with one of the Seniors Council’s computer tutors? They can help you set up a safe, thorough and automatic backup procedure for all your files.

Aperture Paradox

Question:  If “fast” lenses are better, why are so many images taken in the “normal” aperture range?
Answer: The big advantage of “fast” lenses ( and the reason they are called fast), is that they have wide maximum apertures, and so make faster shutter speeds available in low light, without having to bump up your ISO too far.  Another advantage is that wider apertures enable a tighter depth of field, and this is often used to blur the background (or foreground) in portraiture and still life photography.  Even so, for general shots, you’ll typically use an aperture of around F/8.  This is usually the “sweet spot” of a lens, at which it delivers optimum image quality.  Similarly, in many situations you may not want to minimize depth of field – when you want to get both eyes sharp in a portrait of someone sitting three-quarters on, for example.
Marg Jackman

Critique of Photographs

Cooper Hawk By Anne Jones
Cooper Hawk by Anne Jones

General Guidelines

It is hard for a photographer not to be sensitive to remarks about changes and possible improvements to ones’ photographs.  Remember the comments are on the photographs not the photographer.  Some of the comments will carry with them the bias of the reviewer.  As an example a world class female reviewer once told me about this problem by saying:   “I hate snakes, so it is real hard for me to give a good review on a snake, no matter how good and wonderful the photograph may be.”

Also there are no definite rules of what makes a bad or great photo which have come to us from Mount Sinai.  Even generally accepted rules, such as the “Rule of Thirds” can be successfully broken.  For those who do post processing remember there is never a photograph taken that cannot be improved in some way – including how it is framed. Now on with some basics of doing a critique.

Basic Critique Considerations

  1. Is the photo properly focused, with foreground, main subject, and eyes (usually) sharp?
  2. Is the background appropriate, or is it too busy/cluttered? Does it have best focus or out of focus areas appropriate for image?
  3. Does the photo display a good depth of field for subject and treatment of subject?
  4. How is the exposure?  Is it too dark (underexposed), too light (over exposed). blown out, blocked up, or okay?
  5. How is the image contrast?  Flat with little tonal difference or too extreme?
  6. Are the colours accurate or appropriate for subject?  Are there overlaps or bleeding, too much saturation or not saturated enough, or other colour issues?
  7. Is the composition pleasing, properly balanced, and appropriate? Do objects in images give a 3-D effect? Does use of framing, leading lines, image placement, or other composition components, indicate direction or movement, and does this improve the image or distract from it?
  8. Is cropping required, or is there to little or too much cropping to flatter main subject/topic?
  9. Is your eye drawn to the best spot/subject of the image first, and does your view stay within the main subject/topic of picture or are there bright, dark, or highly colourful distractions?
  10. Is it easy to determine what the best spot or subject is?
  11. Is there a clear story line or message in the photo?
  12. Is there a uniqueness or rarity to captured scene or captured item?
  13. Does the photo carry emotional appeal, such as babies/moms, puppies, love, danger, and so on?
  14. Are there any technical issues which distract from the image quality or appeal?

One of the best ways for a photographer to improve is by having their work critiqued.  Even though one may not agree with critique points made, the process helps one identify what appeals to the viewers and what does not.  With this understanding you are better able to create the best photograph you or a viewer likes.  The more you practice and apply your knowledge the better photographer you will become.

Based on this post by Scott Bourne in the Photofocus blog.

Frank Knor

Ted Simard on Lightroom

Thanks again to Ted Simard who gave us a great presentation on Lightroom at the March 3rd meeting.

A little bit of Ted’s background:

  • 50 years photography experience
  • started with black and white and film
  • learned camera settings prior to in-camera light meters
  • using Lightroom and RAW since 2015
  • owns Nikon D500 plus 2 zoom and 4 prime lenses
  • self taught
  • official photographer for Robert Stanfield political campaign in the 70’s and Church of Canada Truth and Reconciliation Commission
  • teaches photo classes at Trinity Presbyterian

He recommended these websites for more information: