Ron Pierce submitted this great image of swirled flowers in response to the summer garden assignment. He’s prepared a note for us explaining how it’s done. Inside his note are links to even more detailed instructions. Thanks for sharing Ron.

Ron Pierce submitted this great image of swirled flowers in response to the summer garden assignment. He’s prepared a note for us explaining how it’s done. Inside his note are links to even more detailed instructions. Thanks for sharing Ron.
At the recent Camera Club executive meeting, Brenda Smith mentioned Julieanne Kost as a good source of tips about Lightroom and Photoshop.
She has many free tutorials on her web site where she also lists several courses she has on Lynda.com. See this post for information on how to access the Lynda.com courses for free.
Thanks for sharing the great tip Brenda.
No matter if your traversing glaciers, skiing the slopes, sledding with the kids, or just trying to capture the first snowfall of the season, there are some winter photography basics to keep in mind in order to get some great winter pictures with your digital camera.
Before leaving the house, check your batteries are charged, you have a backpack with you to protect your camera gear, are wearing warm boots and gloves with removable fingers that give you control, while keeping your hands warm.
The first thing to consider in the temperature. Sure you’re all bundled up, but what about your camera? The batteries in your digital camera do not read well in cold, it reduces their output. Keep your camera warm by carrying it under your coat, as close to your body’s warmth as possible, and carry extra batteries in a warm place too. Rotate the batteries to give them a chance to warm up again. NASA recommends Lithium and Nickel metal Hybrid batteries as they operate best in cold. Compact flash cards function well down to – 20C. Putting a heat pack inside your gloves helps keep hands warm as does wrapping pipe insulation around the legs of your tripod.
Once you get past dealing with the cold, taking winter photographs is a piece of cake. Right? Nope, you’ve got all that shiny white stuff to deal with. If you just “meter the scene”, your camera’s built-in light meter will read all that snow as an 18% grey tone. The snow will look grey and everything else in the picture darker than the snow will look black. A general rule of thumb is to compensate for the brightness by opening up one or two stops or overexposing to let in more light. If your camera has exposure compensation you could try that also. Check your monitor to see what works for you. NOTE: After checking various photographer’s preferences, this guide can range from increasing 1/3 stop to 2 full stops.
Of course if you are trying to photograph the people in that snow scene and use the above method, you run the risk of overexposing them as well. You’ve got to choose which is the most important part of the subject, the people or the snow. If it’s people you’re after, then the trick is to get right in their face and take a reading off the light that’s hitting it. Set your camera accordingly and no matter where you shoot from, you should have the proper exposure. If you can’t get an up close reading,for example, someone zooming by on skis, then take a reading off your hand.
Good lighting is the key and the best time is often early morning or late afternoon That’s especially true in snow. At a low angle, the sun casts long shadows and adds contrast to your subject that otherwise might not be there. Keep the sun at a right angle to your shot early or late in the day,and behind you when it’s high in the sky.
While the idea of capturing the pristine field of snow might sound appealing, it might lead to a boring photo. Look for objects that add colour and contrast to your scene. Colourful ski clothes and dark contrasty shadows abound in winter.
Because of the glare it is often difficult to see the image in your LCD display. Attaching a hood to shade the scene helps or fashioning one out of duct tape can also work in a pinch.
The biggest risk to operating your camera equipment in winter is condensation that forms when you bring cold camera or lens into a warm moist room. If you then take the camera back into the cold the condensed water can freeze. preventing your camera from operating or worse (it can cause permanent damage). To reduce the possibility of condensation, place your camera equipment into a plastic bag, push out most of the air and seal the bag before bringing in into a warm room. Let the camera gear acclimate to room temperature slowly over several hours before opening the bag. NOTE: Another photographer pops out the memory card and puts a clean white towel over everything, as all the condensation will form on the towel, and leaves the camera gear to return to room temperature. When he is in and out of his vehicle he keeps the towel on the gear when it is out of the bag, in the vehicle.
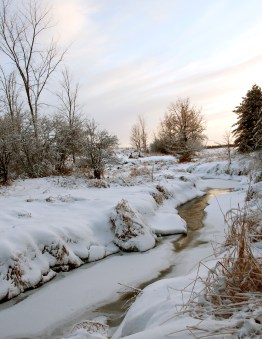
Winter is a time when shape and tone in a landscape is often exaggerated and this can make for some graphic looking photos. In winter, nature provides us with a gift of hoar frost which can cover fences, grass and trees in ice crystals. Other places to look for ice formations are around the edge of creeks, waterfalls, ponds and lakes.
Marg Jackman
In the short run you may have really blown a photo shoot, or missed the animal of your dreams because you were not being conscious about your settings, or you were simply absent minded. The best of the best all fail, but what keeps them on top of their game is the arduous task of owning up to being human and going out to find a solution to your goof.
By the book you may know everything there is to know about exposure triangle, rule of thirds, colour theory etc., but when you are actually shooting do they do more to help or hinder?
Confidence isn’t always consistent and has it’s slumps. So when you have an off day or night, remember another day or night is just 12 hours away.
Learn from your Mistakes. Confidence has a conspiracy with failure. So take 2 steps forward and 1 step back. Stay committed.
Be vulnerable, enter a photo contest and don’t expect to win. Letting your photo hang on a wall, while others look at it, even for a few minutes, is a scary prospect for some. People will love it, like it, dislike it or downright hate it, but that doesn’t mean you are wrong. It means you have succeeded in making the photography world just a little more interesting.. You also never know who you will inspire.
Learn from others but don’t compare yourself to them. So learn from their perspectives, their tutorials and their stories, but don’t get caught up with who is better.
If you start to learn from your mistakes and begin to hang photos on the wall – then guess what? Your confidence will begin to grow, you will have more control over photography. As your confidence grows,it builds and build on itself.
Marg Jackman

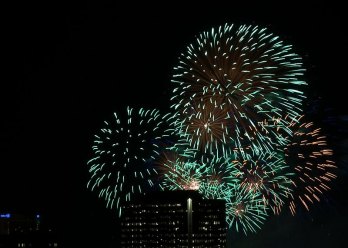
At the September meeting, Anne Jones mentioned that there will be an opportunity to shoot fireworks in Kanata as part of the Lumiere Charity Gala to be held on Thursday, September 22nd. The event will be held at Kanata’s Brookstreet Hotel located here.
She suggested shooting from this possible location.
The web site doesn’t specify when the fireworks will start but sunset on the 22nd is at 6:59 pm and twilight is at 7:29/8:03/8:39 (civil/nautical/astronomical).
Please note that the Club’s Carp Fair shootout is also scheduled the same evening.

To help you compose more exciting and beautiful photographs there are certain key techniques that you can use. Using framing can create extremely impressive and elegant images when done right. Here are some tips.
Natural framing is when you use an element within your image to frame the subject. This draws the eye into the photo and highlights the actual subject. The internal frame can be constructed using a multitude of things you’ll find anywhere – branches, archways, tunnels. door frames etc. as well as things that aren’t solid like light, shadows, rain, fog etc. – it doesn’t matter what you use. Framing is a technique to use sparingly.
Why should you use natural framing?
Natural framing is one of the hardest rules to pull off well. Many people use it to make a boring landscape or scene more interesting. If your subject is boring, no technique is going to liven it up. Framing should be used as an additional interesting element – not as an overlay to a mundane scene.
Natural framing is a very good way to remember that you are in control of how the viewer’s eye will go around the image. Your job as photographer is to direct the eye.
As a photographer you need to make sure that everything you put in a frame is saying something that you want it to – that the elements are all working together to form the idea and feeling that you seek.
A final thought from Henri Cartier-Brisson
“You just have to live and life will give you a picture”.
Amy Lo has pointed out another free course on the Creative Live web site titled Becoming a Travel Photographer. While it seems to be aimed at commercial photographers, it does sound interesting and we all love to travel.
Here’s their description of the course:
The world is full of unique and beautiful places. By learning the business behind travel photography and mastering how to capture and write those stories, you can get paid while filling up your passport; more importantly, you can brand yourself as a travel photographer.
Laura Grier is a photojournalist who has made a life out of exploring the world, capturing, and writing about her experiences. She has worked for National Geographic, Huffington Post, and is the owner of Beautiful Day Photography (one of LA’s most highly regarded destination wedding companies). In this class she’ll teach you:
It will air for free July 28th and 29th. After that, it will cost $99US
Creative live is running a free online course for beginning photographers starting Monday July 11th and ending Friday July 15. You’ll learn:
Thanks to Amy Lo for sharing this with us.