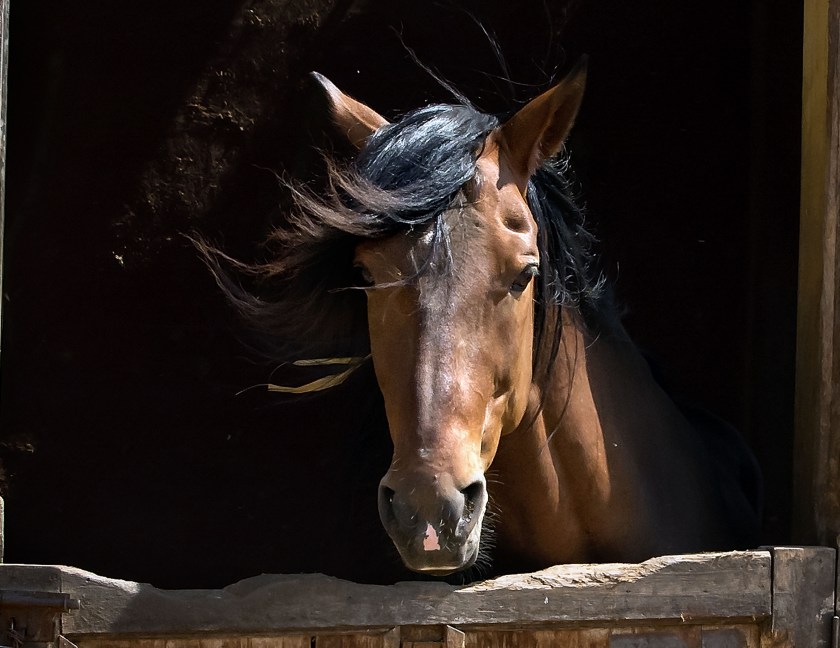
Focus on the Most Important Part of the Subject

33616705694_98502b3761_o
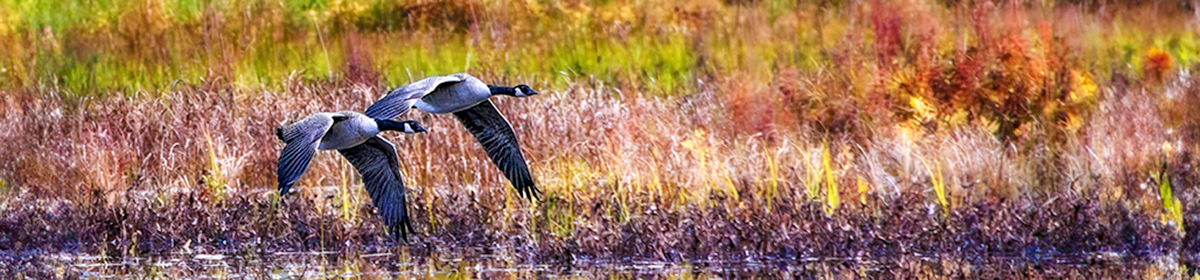
Lovingly Handing Over the Courting Stick by Marg jackman

Autofocus, often called AF, is a great feature on all digital cameras.AF really does help to ensure that your photo is properly focused most of the time.  This can be a challenge, however, when you are photographing up close.  Then the camera’s AF system may focus on the wrong part of the subject because there are so many places to focus on, all at slightly different distances. Whenever you have objects at varied distances within your photograph, you have the possibility of the camera focusing on the wrong object.

Focus is Narrow when you are Close:
When you get close – and this is not just for close-ups – the area of sharp focus gets narrower. The actual point of focus becomes more obvious.  This means you must become more aware of where the camera is focusing and be sure that the important part of your subject is in focus.
The Camera does not know what is Important:
The camera and its Autofocus have no idea what is or is not important in a photo.  Both simply find something they “know” can be sharp.  You have to tell the camera what is supposed to be sharp, and so you need to watch the focus points and notice which ones light up to tell you what is sharp.
The Eyes of a Person are Critical for Sharpness:
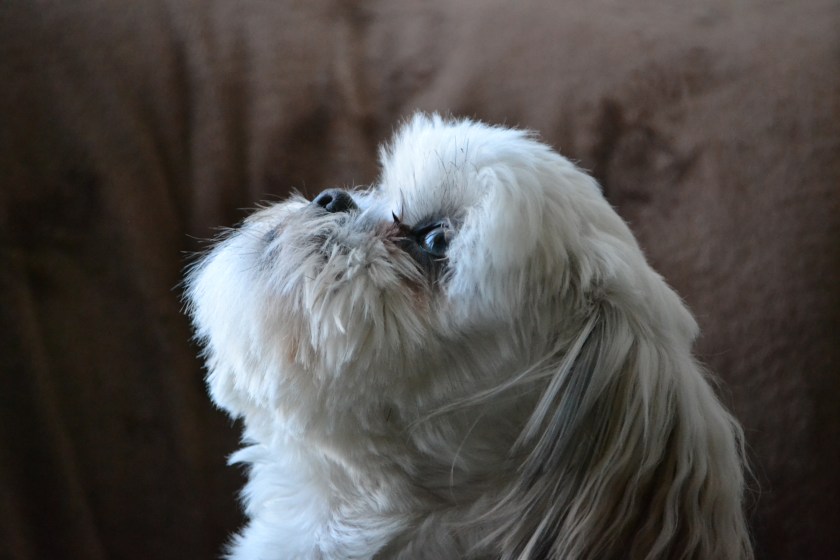
In any portrait, formal or informal, the eyes of the person are the key part of that image.  They tell a lot about the subject, which is why they must be sharp.  If the camera focuses anywhere else, then your photo will be less effective than it could be.
Check where the Camera Focused for Close-ups:
With close-ups, there are many spots a camera can focus on, and they are all very close together in distance.  However, what can be sharp is limited because of the distance.  You may have to press the shutter to lock focus, in order to keep focus on the important parts of the photo.
Marg Jackman

Mud Lake Photoshoot Postponed

We had proposed a photoshoot at Mud Lake to be held May 12th at 08:30.

Here’s the latest from Phil Tughan:

I visited the Mud Lake area this afternoon and although the roadway is perfectly fine, the level of the water in the lake is very high making the pathway muddy and impassable in places. So, unfortunately I think we must call our photo walk off for this week. I will check again next week and see if we can do the walk on Friday, May 19th instead.

Stay tuned for further updates.

Phil Tughan’s White Balance tech tip for May

Phil Tughan found us these  great videos on white balance:

  • Mike Browne on the basics of white balance
  • Mike Browne on dealing with mixed white balance
  • Phil Steele (uses grey card as reference)
  • Mark Wallace from Adorama TV (uses grey card as reference, but mentions that there are other more accurate tools)
  • Lynda.com (says grey or white can be used but uses white)

and a new twist from Marlene Hielema who says:

  • I’m not talking about White Cards – but White Balance cards. Very big difference. The Canon manual is wrong. 18% Grey cards are for exposure, not for White Balance. In my classroom, I have lined up several 18% Grey cards in a row and they are visibly different colours, because that is not their purpose. Their purpose is to reflect a certain amount of light for metering purposes. You might think they are neutral and maybe you’ll get lucky once in awhile, but they are not exactly neutral.
  • Yes. But 18% grey cards vary the most as they were not designed for colour, but for exposure. So in one of my classes I got all my photo students to bring in their grey cards and we shot them all in one frame and there were many “colours” to choose from.
  • It will be close, and for most people close enough. You really need to do a side by side comparison with a proper calibrated WB card to get the true custom WB. Try the Xrite color checker passport and you’ll see the difference. The 18% Grey cards are printed on paper and will fade quickly over time. Actually all of the calibration cards will.

Marg’s Tip for May

Natural Light in Photography

light-1Paying more attention to light is perhaps the most important step you can take to improve your photography.  Different types of natural light can also produce a wide variety of subject appearance even though these all have the same light source.  Three factors influence how natural light renders a subject; time of day, camera direction and weather.
Overview:  Even though all natural light originates from the sun, a subjects illumination is actually composed of several components.

Direct sunlight – warmer, high contrast.
Diffuse Sunlight – cooler, low contrast.
Bounced Light – has qualities of reflecting object.

TIME OF DAY CONTRAST COLOURS DIRECTION OF SUN
Midday Highest Neutral white Near vertical
Evening & Morning High Slightly warm Medium to low
Golden Hour Medium Warm to fiery Near horizontal
Twilight Low Cool pastel Below horizon

Weather:  Along with time of day, the type and extent of cloud cover is the other most influential cause of lighting variation.

Clear Midday Sunshine, is primarily composed of direct downward sunlight.  This results in the hardest and most neutrally-coloured lighting of any time of day. Due to these drawbacks, too often photographers put their cameras away-potentially missing unique opportunities.  For example, water may appear more transparent, since the light penetrates deeper.  If shadows appear too harsh and colours aren’t sufficiently saturated, try converting to Black and White, since these may even benefit from the high contrast of midday light.

Evening and Mid Morning, becomes slightly warmer and begins to cast noticeable shadows.  Subjects appear more three-dimensional.  It is not as neutrally coloured as midday, but not as warm or intense as sunset and not soft and diffuse as during twilight or overcast, but these qualities make it a good all-round time of day for photography, but also run the risk of making photographs appear too ordinary.

Golden Hour and Sunrise/Sunset are typically regarded as having the most desirable light to photograph.  Horizontal light that cast long shadows and gives subjects a warm glow.  Make sure your cameras Auto White Balance doesn’t counteract an otherwise warm-looking scene.  When the lighting is most dramatic is also when your camera is most likely to make an error with its exposure; take several shots or use partial or spot metering.  Sunrises often have calm quiescent quality particularly with scenes involving water – that isn’t present during Sunsets.

Twilight, Dawn and Dusk typically describes the 1/2 hour before sunrise and after sunset, when the sky is still bright. but there’s no longer any direct sunlight, with one side of the sky appearing warm and reddish and the other becoming a cool blue or purple..  Cameras can often overexpose a twilight scene when using auto exposure, potentially washing out the otherwise delicate colours.

Shade and Overcast Sunlight typically have a cool soft appearance since the source of such light is spread across the entire sky and doesn’t include any direct sunlight.  Many photographers shy away from this type of lighting but doing so is often a mistake.  Depending on the degree of cloud cover, bright overcast light can be ideal for outdoor portraits and wildlife , as can subjects containing both dark and light colours,since it doesn’t cast harsh shadows.  A common trick is to keep grey sky out of the picture unless the clouds are moody and highly textured.  Images straight out of the camera often appear more bluish than desired, so shoot in RAW and adjust White Balance afterwards.
Stormy weather can produce extremely light contrast since rain clears the air of haze and dust.  Sunsets after a storm are also often the most dramatic.

Other scenarios include photographing in the fog, mist and haze which not only decreases light’s contrast but also does so progressively for most distant objects.

Marg Jackman

Macro Photography and Archiving at Henry’s Kanata – Update #2

We previously covered Henry’s on macro and archiving day here and here.

Alex from Henry’s has added the following information on available seats, a free print offer and increased trade in value:

              We are at 25 for the event. We’ve called in back up from another store so we’re capping attendance at 30 instead of 20. So there are still a few spaces left. If we fill up and there’s enough interest we’ll look at running the event again.

                During the event we’re going to have a pro printer set up and everyone is allowed to get one free 13×19 print – so people can bring in a picture on a USB key, or choose to get one of the photos they take during the event printed up for free.

                For the day of, our purchasing department is allowing us to offer an increased 15% trade in value on any items that people would like to bring in. So if someone is hoarding away a working camera or lens, now is the time to bring it in and trade it up for something else. If people do end up getting cut off with the 30 person cap we have on this event then so long as they come in on Sunday afternoon, with proof that they are from the camera club, we can offer them this deal as well. If it’s a camera that they’re looking at trading in they should make sure to bring the camera’s charger and it’s battery. People can call us anytime before the event to find out the value of their gear.

Get Sharpness With Other Camera Supports

OLYMPUS DIGITAL CAMERA
Spring Runoff by Carol Brown

Tripods are not the only option for getting added sharpness when shooting at slower shutter speeds.  Travelling with a tripod can be difficult if you must pack really light.  In addition, tripods can be hard to take to some places, such as when you are photographing along a historic street with some tourists who might trip over them.  Some places even prohibit them.   Tripods can also be awkward to carry and move around in some settings, such as at sports events.  Luckily, you have alternatives.

Beanbags Make very Portable Supports:
Beanbags are very pliable bags against a solid surface.  Some actually have beans inside, although most have plastic pellets.  The bag molds against the camera to help you hold it stable against a post, chair, bookcase, parking meter, or any other convenient, non moving object.
Monopods are  Great for Sports Action:
A monopod is like one leg of a tripod with a head on top.  These are great for shooting sports because the monopod can carry the weight of the camera and lens as you watch the action develop.  They can be used in a lot of situations where you need a slower shutter speed but cannot use a tripod, and you can quickly move out of the way if needed.
Gorillapods Wrap around Objects:
The Gorillapod looks like a miniature tripod with bendable legs.  It comes in different sizes for different sizes of cameras.  Although it can support a smaller camera directly, most of the time a Gorillapod is used by wrapping its legs around a solid object, such as a post.  The unit itself is very lightweight.
Table tripods can help with Small Cameras:
Miniature, folding tripods can fit into a camera bag, and can be opened and used on a table or any other flat solid surface to keep your camera stable during exposure.  The smallest ones can be kept with a pocket digital camera to let you shoot with slow shutter speeds anywhere.
Marg Jackman

Macro Photography and Archiving at Henry’s Kanata – Update

Henry’s has provided more details on their in-store workshop on macro photography and archiving described in this earlier blog post.

Where: Henry’s Kanata, 501 Hazeldean Rd

When: Sunday May 14th at 9am until ~noon

What: A morning to come into the shop and chat about everything to do with macro. The store will be split up into five different macro stations and participants are welcome to wander between the five stations, splitting up their time equally between each, or only sticking with the one(s) that interest them most.

Each participant should bring, at the very least, their camera and a memory card as every station will have a ‘workshop’ aspect and many lenses will be on demo.

Stations:

  1. Archival: This station focuses on tackling the challenges that film, slides, and old printed photos create in an increasingly digital world. At this station we will discuss several ways to digitize these non-digital formats by using digital cameras and/or scanners. We will also look at the restoration side of this process, using Lightroom and Photoshop to repair slide and film that has begun to discolour and pictures that have cracked.
  2. Perfecting your macro set-up: This station is about the slightly less fun side of macro photography – here we’ll have a variety of lights, supports, and camera triggers. Everything you need to make macro photography easier. If you already have a macro set up, (camera, lens, tripod, lights, etc …) but find you’re still not getting the quality, or ease of use that you’re looking for, then this station is the one that’ll help you troubleshoot your set up.
  3. Super Macro: Normal macro typically gives you a 1:1 ratio, this station is all about taking it further and tackles all of the challenges there are to overcome when shooting at 2:1 and beyond. On demo we’ll have lenses like the Canon MP-E65mm, to extension tubes, to reverse lens setups. Participants interested in this station should come armed with a lot of patience as the rules of light and aperture and focusing can get a little funny.
  4. Indoor Macro: A station that’s armed with a lot of the fun things you could’ve been shooting this winter. Here we’ll be focusing on things like freezing bouncing water droplets, and focus stacking. Although, this is also the station that will cover general macro photography (ex. Jewelry/product photography, still life, ect…)
    5. Outdoor Macro: While we unfortunately can’t go outside for this station, we will be bringing a garden (or, parts of a garden) into the store. This station focuses mostly on flower/nature photography and branches away from pure macro related topics to also include information about composition and technique.

What is Macro Photography?
At it’s simplest, macro photography is when a subject is projected “life sized”, a 1:1 ratio, onto your camera’s sensor. Macro photography typically requires the use of specialized lenses, lights and other equipment. It is a very subjective genre of photography with subjects ranging from jewelry to insects, organic to mechanical and everything in between.
Macro photography can range from the simple to complex, flowers blooming to bouncing water droplets.

Here are a few links to prepare you for our workshop:

  1. https://photographylife.com/macro-photography-tutorial/
  2. http://www.diyphotography.net/the-comprehensive-guide-to-macro-photography/
  3. https://photographylife.com/high-magnification-macro-photography-on-a-budget/
  4. https://fstoppers.com/commercial/how-photograph-jewelry-catalogs-35913
  5. http://www.exposureguide.com/photographing-flowers.htm
  6. http://www.nikonusa.com/en/learn-and-explore/a/ideas-and-inspiration/macro-photography-tips-photographing-insects-and-other-small-creatures.html
  7. http://www.nationalgeographic.com/photography/photo-tips/macro-photo-tips/